Friday, May 25, 2012

4 photos & a cup of coffee

checked out "Uncommon Grounds" today on Barrington Street, had a lovely cup of coffee outside, people watched & took a few photos. It doesn't have to be anything fancy for me to enjoy taking a photo - this time of year is just pretty. I also checked out Carbonstok, which is right next door to Uncommon Grounds....I think I checked out everything in the store. All of their products are selected based on their compelling design, as well as the impact their creation and use has on the environment. Pretty cool stuff. They even have greeting cards made out of elephant poo - I kid you not!!!

Thursday, May 24, 2012

All Things Grow With Love, right?

"A watched kettle never boils"...that is what they say, right? I keep looking in the cans to see if anything sprouted yet. It hasn't even been a week. Should've started these ages ago, but..oh well, I started them now. I had some tin cans so I just turned them over and poked some holes in the bottom....Actually, it was such a pain to try and hammer a nail through the bottom, then I ditched that and used the can opener to make holes in the bottom..just like when you open a can of apple juice, only I made 6 or so. I put the tin lid in the bottom so the dirt wouldn't fall through the holes in the bottom. I put some smashed up pieces of a terra cotta pot in the bottom of the can. I read that the terra cotta absorbs the water and retains in and it helps keep the soil damp so it doesn't dry out as quickly as it normally would. I just bought a few terra cotta pots in a stack at Value Village for .99. I put the pot in a gift bag that I had, help the opening closed and smashed the outside of the bag. When you smash inside of the bag, you don't have to worry about little pieces flying all over the place. I put a few pieces of terra cotta in each tin can and then filled them with soil, planted the seeds..blah,blah,blah. Anyway, if I had a "do over", I would have done the labels before I put the dirt in. I was just going to leave them plain and then decided I would label them. I found some free label templates online and printed some out. The template was actually too small so I printed a smaller one and enlarged it on my photocopier. I sprayed the labels with modge podge sealer so the ink wouldn't run, when that was dry I put a layer or homemade modge podge on with a paint brush (just mix half white school glue and have water & stir), then a regular spray sealer over that. It is one from Michael's that seals crafts etc.  Truth: I was out of glue, just did the first step, used my hot glue gun to glue the label on and then sprayed with sealer...later went to 3 different places looking for plain old white glue....Michael's was the third place I went and I bought some there. I put a coat of that on over the sealer...good grief!!! I really should do this again, but do it the proper way. They are going to look so much better when they have food sprouting inside of them.

Wednesday, May 23, 2012

Radishes

My Mom was the one who said to me "if you want something to grow quickly, plant radishes...but nobody likes them".lol. I planted these seeds 3 days ago. I do have them in my makeshift greenhouse in the  house. I guess that makes them grow faster. I also took 2 out of this tray and put them on the window ledge and they are not as big but they have started. I should've taken a pic of those ones. I will do that tomorrow. You may have noticed my lovely seed holders. They are toilet paper rolls cut in 2. I found this idea online and it said to use a full toilet paper roll, but you are going to transplant these outside so you don't need a lot of room (I say, cut them in half). The idea with this is that you don't have to disturb the plant when you transplant it outside. The instrucation say to peel off most of the paper before planting, just leave a thin layer on. One thing I should mention: when I did pick up the other 2 plants from this tray to move them to the window ledge, they were pretty soft & fragile. I am not sure if I would put something on the bottom next time. Not sure what, but something that you can easily take off right before planting or make a hole in the bottom for the roots to get through. Just an idea of how to keep them a little more sturdy and also so the dirt doesn't fall out the bottom when you pick it up. I read a few articles about how quick these plants are to mature. Guess I should go now and look up recipes that have radishes in them. I know they are good sliced thin on a salad. 

watching the garden grow

I am a little obessed with my tiny little garden. In this photo you can see that the lettuce, spinach and beans are growing...hooray. This little garden is only 3.5' x 3.5' but I managed to fit in spinach, lettuce, beans and patio tomatoes. Everything seems to be doing well. It will be so nice to eat something that I have grown myself. I can't wait. I also did a little soil test (ph test for $1.90) which was purchased @ Halifax Seed. I just had to take some soil (4" down), put enough in up to a line that is marked for you, break open the capsule that comes with the kit and pour that in, then you add distilled water up to another line marked for you. You put the top on the tube and give it a shake. The water will be anywhere from yellow to orange to green. Mine was green which is fairly neutral. All should be well. You don't want your soil to acidic (unless you planted plants that love that) or too alkaline. Sort of the same rules that we have for people. You don't want a diet that is too alkaline or too acidic. If your soil is not in the neutral zone, there are many ways to fix that. Just look them up online because the ideas are endless.

Time Out

I don't like a lot of signs in my garden but I thought this little bench was cute. I picked it up @ Value Village for $5.99. It really is a great place to go (for me, anyway) to get photo props and garden things...you just never know what you will find. I guess it just depends what you are looking for. Anyway, I went there today and found a lot of useful things. I bought a bread box that has a plexi glass top...pretty hideous as a bread box but I can use it as a mini greenhouse. I will post pictures soon of that find. I paid $12.99 for it. I bought a clip on light that will come in handy as a light source for my plants that I am trying to get growing and toughen up so they can go outdoors.

rooting basil & mint

 So...I decided I wanted to do some cuttings because I read how easy it was to do and that I should see roots in a week. Well, that would be if you followed the instructions or bothered to watch a youtube video on how to do it properly. I am so guilty of that - skip the tutorial and jump in, mess it up (sometimes), but that is how you learn on your own I guess..lol. Anyway, found this little vasey kinda thing at Value Village for .99 (if memory serves me correctly) & it is great for mayflowers..something teeny tiny. It also happens to be great for small cuttings. I guess I should've cut the basil on the main sturdy plant, no just cut off at the bottom of a leaf. Watched a video (on youtube..who knew?) & you just make an angled cut on the stem...trim off any leaves that may stick in the water. You just have the stem stuck in. I still have my leaves stuck in this water. Who knows? maybe something will happen. I also took 2 more cuttings (the proper way). I'll keep you posted. The bottom photo is of 2 cuttings of my mint plant. I cut them the "proper" way. Like my vase for that one? I know a lot of people wouldn't bother rooting mint and making more (the stuff goes crazy) but I have some in a pot to keep in contained & I will put more in my front little garden. It is slowly becoming full of "wild" things that I gather here and there: wild strawberries, daisies, johnny jump ups, blackeyed susies..forget me nots & soon....mint...lots of mint...lol


Tuesday, May 22, 2012

Somborka White Peppers

My neighbour gave me some somborka white pepper seeds from Kosovo (where he is from). This got me interested in finding out what I could about growing peppers. My neighbour said to put the seeds in a glass of water overnight and only plant the ones that have sunk to the bottom in the morning. I am also trying to germinate some seeds in a wet/damp paper towel (not dripping with water but wet) & then I put that paper towel in a ziploc bag, not sealed up. I am also trying a paper towel method with chamomile tea. The instructions on the internet said to make a cup of chamomile tea (steep 5 mins) and then use that same bag to make a second cup of tea. Use the mild tea to wet a folder paper towel on a saucer. Place the seeds on the paper towel and cover them with another folded paper towel, dribble some more tea over the paper towel...again, quite damp/wet. Put the seeds in a warm place. I have mine in an aquarium that I use as a mini greenhouse. Don't let the paper towel dry out...when it is starting to dry, dribble more tea on the towel. Here is the description I found on the somborka pepper: mid-season peppers that are very productive and have mild hot flavor that is so pleasant in fresh salads or salsa. Fruits ripen from light green to light yellow to light red when fully mature. Medium size, bell/conical shape, thick walls. 

Pepper tidbits: all peppers are perinnials (I didn't know that - good to know). Also, don't plant them in peat pots. No one knows why but they just don't survive...I guess peppers don't like peat. I found other articles that said make sure not to plant them in a soil that has a lot of peat. It may have something to do with how wet the peat stays, encouraging mold. I also read that the hotter the pepper, the longer it takes the seed to germinate. I guess I will have to be patient...hmmmm?? I'll keep you posted.

Update: out of 10 seeds put in the glass of water last night, 7 sunk to the bottom. Pretty good...70%. Supposedly, the ones that sink are viable seeds and you are supposed to just toss the ones that are still floating (for this particular type of seed)

I Still Play In The Dirt!!!

I have a confession - I still play in the dirt. There is just something special about growing something yourself. I get a lot of enjoyment from sprouting seeds and checking on them each day to see the progress they have made. The very best part , of course, is when you get to eat something that you actually grew yourself. The top photo is a valley grown herb - hot & spicy oregano. I put some in my last batch of spaghetti sauce and I think that is what gave it that extra zip. I actually took several herbs out of my bucket (chives, basil, oregano,rosemary & thyme)...just bits of each..gave them a little rinse and balled them up into my loose tea holder thingie. I am talking about a little silver tea holder that has a little chain on it that you are supposed to hang on the side of your tea cup. I bunched all of the spices up, put it in the tea holder thingie and hung it on the inside lip of the crock pot into the sauce. It works really well and you don't have to bother chopping any of the herbs up...super easy (I am a big fan of super easy)

some bush beans which are like summer candy, in my opinion. I planted a few in a pot and the rest are going in my raised bed...yummy!!!

Sunday, May 20, 2012

Eggshell Planters


Eggshells are perfect for starting seeds. I just rinsed out the eggshell a little (you don't have to) and added some soil, moistened it, added seeds, covered with a little more soil & moistened the top of the soil.  When the plant is ready for the outside garden, just transplant them straight into the soil, shell and all. This is great for beans and sunflowers because they don't like to be disturbed. I just read a tip on the internet that said don't forget to crack and peel away the bottom of the eggshell so the roots can spread out....oops..wish I had read that "LAST WEEK". I hope the little roots can crack on through to the other side.


DIY Garden Markers


I have tried several ideas for garden markers. I bought spoons from Value Village at .25 each and cut out words, glued them on, added some stickers, sprayed them with a sealer...however; didn't wait the 24 hour time period that I should've....big rain storm, spoons got discolored..oops. I tried to use a sharpie to write on wooden spoons, but the markers bled. My son-in-law suggested that I use pencil and then spray the sealer over that...it worked. I was wishing that I had a small child to print on the spoons for me.....I think that would be even better.

Friday, May 18, 2012

OUR FOOD Project - I am so excited - I have a plot in our new Community Garden!!!

This is a video that I tried to share the other day on this blog, but for some reason, I could not "share"..just wouldn't work. I finally abandoned my efforts to do so. I have been wanting for a time to be part of a community garden & contacted a farm last year, but they did not have any openings, so I continued my search online. I decided to send off an email just to try to get some info. I received an email back right away and a phone call the next day putting me in touch with some folks who were just getting a new Community Garden going in my area. My name was put on a waiting list and apparently the interest was so great, it was felt that some people may have to share beds if need be. Didn't matter to me, I just wanted to be a part of it. Anyway, I received a phone call back yesterday saying that I had a plot - 6' x 12' for $10 per year....are you kidding me??? I went down and paid today and saw the carpenters hard at work building the raised beds and filling them with organic earth. The funny thing is, I was asked on the phone if I was on Facebook and if so, told to check out the new page on the BLT Community Garden. The video I had been trying to upload 2 days ago is the same one they have featured on their page.....so cool!!! I am pretty excited about the whole idea and can hardly wait to get planting & sharing.

All Decked Out!!!

My herb bucket is starting to come alive with my garlic chives, lemon thyme & lavender (perinnials from last year) & my newly planted nasturtiums & curly parsley (annuals). On the back deck, I have some pots of different types of leaf lettuce ,a few bush beans and a pot of nasturtiums. On the front deck, I have another pot of lettuce and also a pot with tarragon & purple basil planted.

attempting to make different garden markers....some of the markers bled through even though they are not supposed to and even with a sealer over the top...oh well!!..they work.

I have a few "happy places" but definitely digging in the dirt on a gorgeous spring day is way up there on the list.

Monday, May 14, 2012

Mama has a new Playstation!!!!

I am so excited about my find today @ Value Village. I managed to score an old aquarium, just had to buy a light bulb from the dollar store, wash it out, dry it...ta da..my mini greenhouse. I also bought the table for $3.99 @ Value Village. The tank was $12.99. I didn't mind paying that a bit. I saw a mini greenhouse on the weekend that was priced at $168.99 - it was red, it was cute but I would rather spend $12.99. Anywhoo...I have lettuce in the greenhouse, organic green beans, yellow beans & microgreens. I am so excited...eeek!!! I keep checking on it, seeing if things are growing. Anyway, it is my new playstation. I am super happy with it.

Tuesday, May 8, 2012

Mason Jar Herb Garden

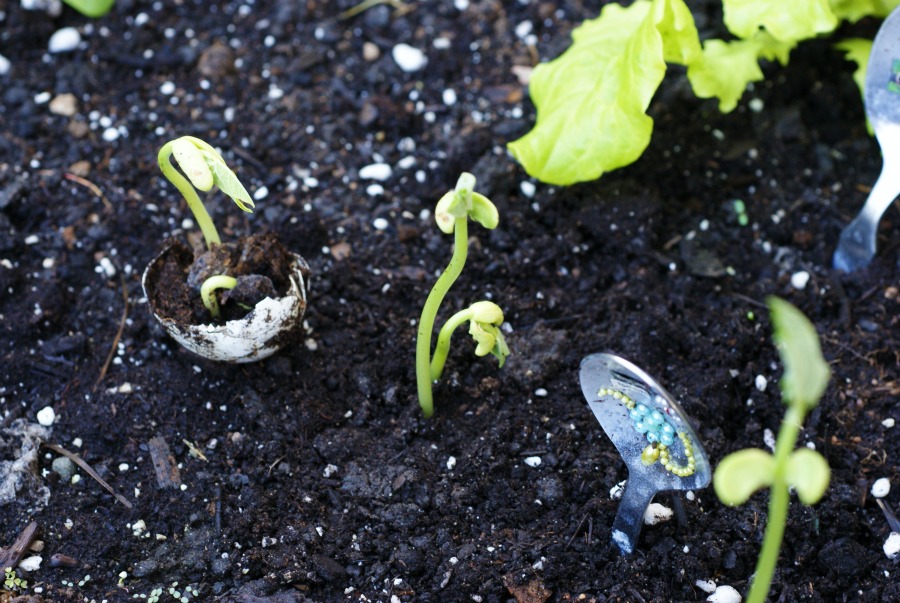
I saw this idea on Pinterest & thought I would give it a try. The supplies needed are: mason jars, chalkboard paint, masking tape, terra cotta pots, a hammer, earth & herbs. I bought 6 mason jars @ Value Village for $1.99. I also picked up two terra cotta pots with saucers for .99 each. I already had masking tape. I bought the chalkboard paint in a spray can..it was $5.49 @ Canadian Tire. I took a clean mason jar and taped off a spot to spray my chalkboard paint. I put a label on the jar, taped around it and then removed the label and sprayed the paint on. To tell you the truth, I didn't like working with the chalkboard paint. It runs pretty easily and seemed to be more hassle than anything. I then went on and tried spraying some chalkboard paint on some small plastic garden markers that I already had (dollar store)..again, not pleased with how it turned out and they are not easy to write on..not going to use them. So....if you aren't using any chalkboard paint, you just bust up the terra cotta pot with a hammer (fold it inside a newspaper so none of it flies at you), you will be left with chunks of terra cotta. Put a few in the bottom of the mason jar...as many as you like. I would say maybe four or five chunks. Fill the mason jar up over half way and then add your plant, fill in around it with more earth. Water the plant.

*the reason you use the terra cotta in the mason jar is for drainage and also the pieces will hold moisture and release it back into the soil, keeping it moist. Just place the jar in a sunny window, place it outside when the weather is warm (if you want to) I think it makes a hardier plant when it goes outside. Some folks grow indoor herbs all year long. Anyway, I am pleased with the finished product even though I wasted money on chalkboard paint. I will just have to use it for another project. PS: I ended up using my previously purchased garden markers (dollar store) and wrote on them with a permanent black marker - easy peasy!!

*Also...you could grow your own herbs making this more economical but I purchased these Valley Grown Herbs that look really healthy @ 3.29 each. I know you can get them cheaper, but I like nice, healthy, hardy looking ones.
supplies


chalkboard paint experiment


finished product

Before & After Changing Table Project

Before
I thought this would be easier to see side by side...previous post has all the details of the project.
After

Monday, May 7, 2012

Changing Table Revamp!!!!

Here is the changing table redone. I am not super pleased with how it turned out. The finish on the pressboard is hard to cover. Maybe if I had a "do over" I would pick to roll paint on instead of spraying it. I like the quick and simple way so that is what I get for that...lol. I ended up washing down the table, drying it and then lightly sanding the surface with a 220 sanding paper (very fine). I ended up using 3 cans of spray paint at $5.79 a can, so the paint did cost me more than the table. I could not find a changing pad that fit exactly so I washed the one that came with it. The pad was trimmed in pink, which I didn't want because the table is for my grandson. I don't sew or have a sewing machine so I bought bright yellow extra wide bias tape and used Liquid Stitch (permanent clear drying adhesive) which is super easy to use. The bias tape was $2.50 and the Liquid Stitch was $5.00 @ Walmart. Anyway...the table was $14.99 and my materials were roughly $35.00. I think I could've done this project cheaper if I had used a can of paint. Anyway, it isn't perfect but it has lots of storage and a space to change the baby.

Sunday, May 6, 2012

New Project - Baby Change Table


Pretty excited about my new find. I purchased this baby change table for $14.99 @ Value Village. I want to fix it up & give it to my daughter for my grandson. It is actually in great shape but I thought it might be nice painted. It is made of melamine board so I need to research what kind of paint to use on it & also decide what colour - do I change the knobs?? Do I leave it part white and part another colour?? decisions, decisions!!!!! Anyway, $14.99 ..how could I go wrong??

Garden Update!!!

I planted my garden super early because I just can't stand to wait. It is only early May and we are sure to have some frost again. I did a little research though and figured out I would be okay with a raised bed that I cover at night. I have the tomato cages on each corner because at night I cover the garden with a clear shower curtain (purchased at the dollar store) that I peg down with some tent type pegs. I use the cages to drape the plastic over so the plants won't get crushed by the weight of the plastic curtain. Things were going along fine until I caught some robins taking my green and yellow beans...that is why I have some pop bottle covers over some. My neighbour has offered some chicken wire to help with the robin issue. In the meantime, I have started some new bean plants indoors & I can transplant them outside when they are big enough. I think the robins are only interested in the seeds, not the plants.

Wednesday, May 2, 2012

It's Spring!!!!

 I built a small raised bed today from a kit I purchased at Canadian Tire for $49.95. Just built the box, marked out the square on the grass & got my son to remove the grass with a shovel. The square was filled with 3 large bags of earth and 2 bags of sheep manure. I have some of my own compost that I think I will add as well. The square is only 3 ½ x 3½ but it will be enough to grow a few vegetables.

I also love to start a few seeds indoors...mostly because I am impatient and I can't wait to get something planted. I have a few different varities of lettuce started on our window ledge. The "grand rapid" variety started to sprout in 3 days...my kind of seeds...lol